Tag Archives: rub on transfer

Decorated TN Kraft Folders

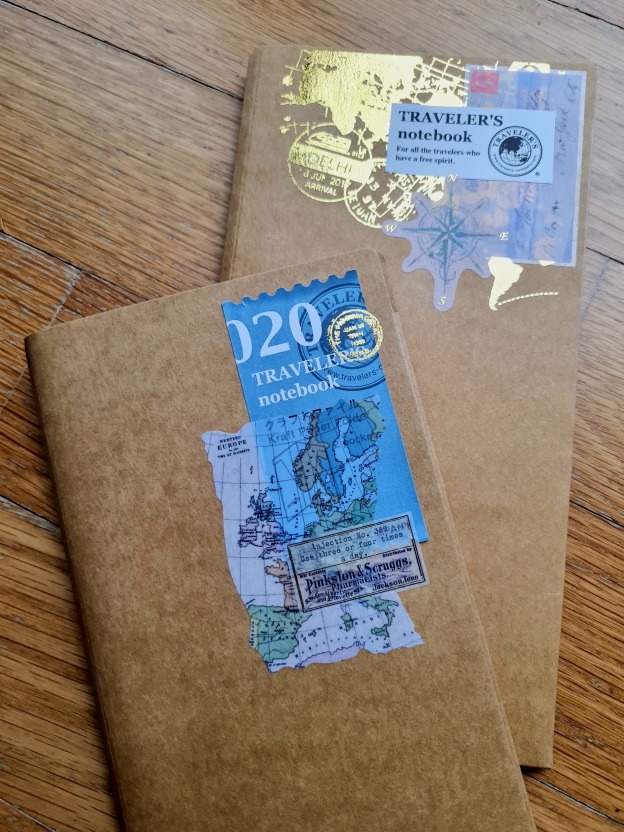
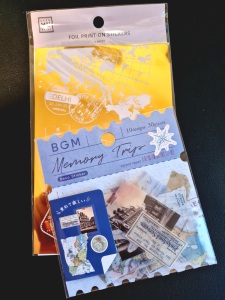
I have left the kraft folders in my standard Traveler’s Notebooks unadorned, thinking it’ll be more meaningful if I use stamps/stickers from my holidays to decorate them. But since our Japan holiday was cancelled, and I was attracted by the BGM Vintage Blue Flakes Seals, I decided to combine them with the MU Craft Foil Print-on Stickers (Postage) for some quick & easy embellishments.

The blue sticker from the TN Kraft Paper Folder packaging was gingerly removed and placed on the top right corner of one of the kraft folders, then 2 stickers selected from the BGM pack to create a simple collage. I love how the PET film and washi stickers from the same pack complement each other for a cohesive vintage look!

For the other kraft folder, I first laid down a background from the MU Craft Foil Print-on Stickers, then layered on the BGM stickers. A mistake, since the gold foil is no longer shiny after covered by the translucent stickers. The whole design is topped off with a segment cut out from a paper label from a TN refill pack.

I was initially surprised by all that shiny gold on the MU Craft Foil Print-on Stickers and was handling the sheet very carefully. Only upon usage did I realise the white printed segments are the areas to be rubbed on for transfer, not the reflective gold areas. It’s nice to be able to fussy cut out little spots of designs to be used wherever one desires.

The back of the kraft folders are embellished in a similar manner, this time in the bottom left corner. I made sure there’s a mix of PET film, washi stickers and gold foil rub-ons for variety.

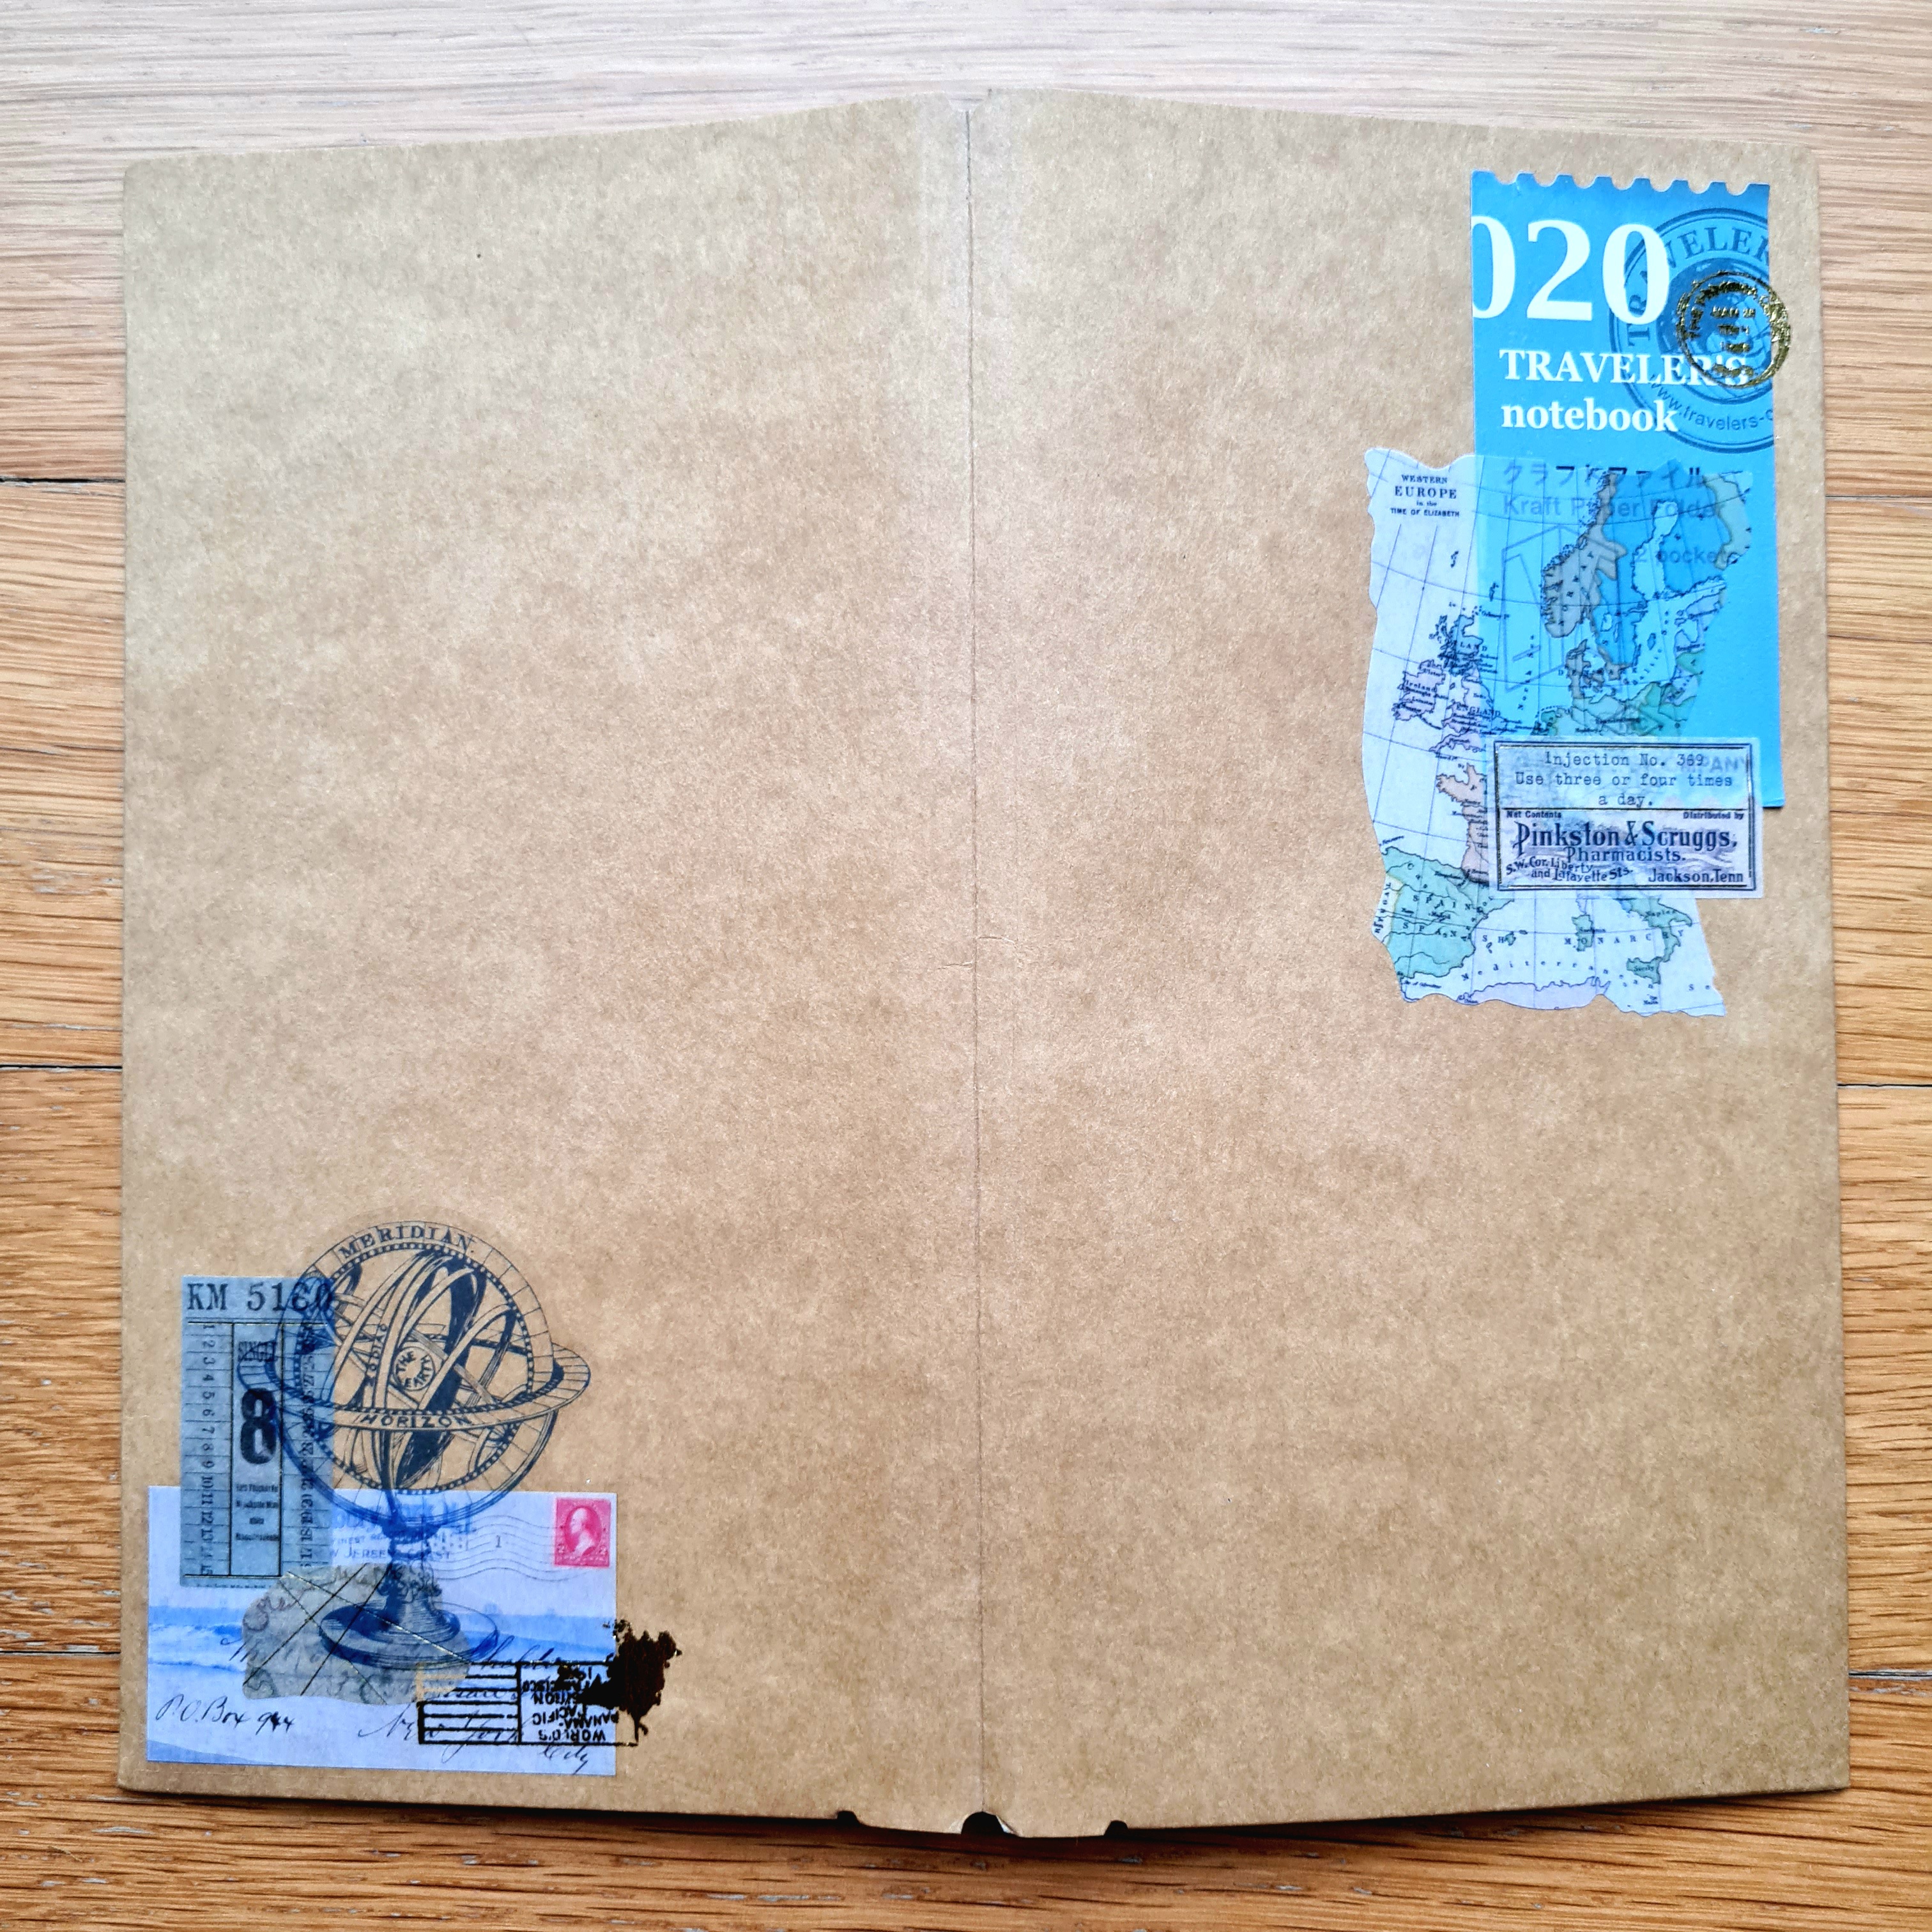
I left plenty of white space in the embellishment of these folders as I love the look and feel of the brown kraft paper. The designs are also totally flat, so that I can easily clip on maps & papers on the flat surface when using the TN notebooks on my travels. Initially I considered decorating the inside of the kraft folders too, but decided against it in the end. Those areas will be left for stickers & stamps collected in future travels!

Bande Transfer Masking Tape

Bought a Traveler’s Notebook and wanted to decorate the plain cloth pouch that came with it. So out came my rub-on transfers, including my new bande transfer masking tape – gold stars.

While it is convenient to have the rub-on transfer in washi tape roll size, I found the top layer hard to peel off after rubbing. Probably it is not designed for use on cloth (no such mention on the packaging).

But the resulting transfer gives a pretty bling-bling metallic sheen. I’ll probably use it to create borders in future, as the tape design makes it easy to form straight lines.

I had thought to create a kind of abstract picture on the pouch, transferring the full marble design from Craft MU in random patches instead of forming a complete background. But it wasn’t possible to add the gold stars on top of the green areas, as the sticky tape would remove the pattern when it is peeled off. I had to slot in the gold strips wherever I could.

The resulting design is totally not what I imagined when I started the project! I’m now thinking how to salvage this…….if unsuccessful, I’ll have get another cloth pouch for my traveler’s notebook.

More Rub-On Transfer Pouches

Having enjoyed the results of the rub-on transfer pouch craft kit, I decided to try to use up the print-on stickers by creating more of such drawstring pouches. Of course, this meant spending more money to buy plain cotton pouches to craft on!! Luckily the local stationery shop Art Friend sells such stuff at a very affordable price – quality not as good as what was supplied in the craft kit, but it’ll do for simple usage.

I repeated the same formula of combining the two types of rub-on transfer stickers on the corners of both sides of the pouches. Really love the mix of vintage and floral prints!!

The 2-set bundle of transfers from Tokyu Hands had included a pack of coloured marbling prints. It’s tiring to rub and transfer the entire large rectangular area, not to mention it would look boring, so I worked on just one section of the rectangle on 1 side of the pouch, ending randomly at the edges. The remaining parts I used on the opposite side of the same pouch and added large floral prints to anchor the design.

I had some yellow floral rub-on transfers in my stash that was gifted by a friend last year. The prints are smaller though equally pretty on the pouches. But perhaps due to long storage time, it was more difficult to work with this old set of transfers: I had to put in more effort to rub for the transfer to be effective, and any overlapped portions tend to cause the designs to be removed by the new stickers instead of being added on. One pouch was totally wasted when I tried to create a wreath-like design around a vintage sentiment, and ended up having several blank patches where I tried to fill up the wreath to look fuller.

After working on 6 pouches, I still have a few floral prints left. Think I’ll use them up in my schedule book so that the quality of the transfer stickers won’t deteriorate in further storage.

Rub-on Transfer Pouch

Didn’t get to craft much last month as I was busy with work. So for some quick me-time and a fast project, I decided to make use of the rub-on transfer kit I bought earlier from the Cityluxe online shop: a Craft MU Series print-on sticker set, which comes with a plain cotton drawstring pouch.

Separately, I had also gotten a 2-set bundle of print-on transfers of the same brand from Tokyu Hands – the price is about 10% cheaper due to limited designs and the bundle comes with a sturdy wooden stick. I decided to try combining the floral designs with the vintage prints and keep the marble print aside for future projects.

Basically for rub-on transfers, one just has to cut out the desired design (so that the rest of the sheet doesn’t get in the way during the transfer), remove the backing sheet, place the design flat on the craft surface, rub all over the surface with a hard object eg. wooden stick, plastic ruler or bone folder, then peel off the plastic sheet.

I must say that compared to the quality of the rub-on transfers decades ago when I was a teenager, the print-on stickers nowadays are of much much much better quality: the designs are not only pretty with plenty of variety, they come off easily and cleanly without breaking into pieces. Provided of course, that one rubs on all over the design fully – always peel off the plastic sheet slowly, then it’s possible to replace the plastic to complete the rub-on transfer should any detail be left out!

I am very glad that my ideas worked out as well as I imagined! The muted floral colours combined really well with the wordy vintage prints! The bouquet of flowers on one side of the pouch is a tad smaller than I expected for the centre of the pouch, but I’m pleased enough with the composition.

I have yet to use the pouch so I don’t know how lasting the print-on designs will be. Tried scrunching up the cloth pouch and the transfer is still intact with no visible cracks, so I guess light duty use will definitely be fine.

I once read an online comment that rub-on transfers are slower to work with compared to using stickers and paper/glue. This is true when one is used to speedy crafting. Compared to using ink & stamps and other multi-media techniques, however, this method of getting the desired design is faster and less messy – and nothing to clean up afterwards!

I love how this technique gives flat results, so it’ll be good for my schedule book or where I don’t want any bulkiness at all. But since the rub-on transfers are good for non-paper surfaces, might as well make use of the expensive (compared to stickers) print-ons for decorative wood slices. I’m also considering getting a pack of similar cloth pouches to make a whole set for gifting. Or perhaps some quick coasters?