Monthly Archives: June 2022

Crafting with Boxed Cards – Window Cards

I love getting American Crafts boxed cards during a sale – at about S$20 for a set of 40 cards, it amounts to only 50 cents per card & envelope, providing a really good base for quick card making, or even to use directly if necessary. But it is difficult to find a set where I like all the 10 designs provided; often the sentiments do not say what I want, or the prints for some of the cards make difficult backgrounds to work with.

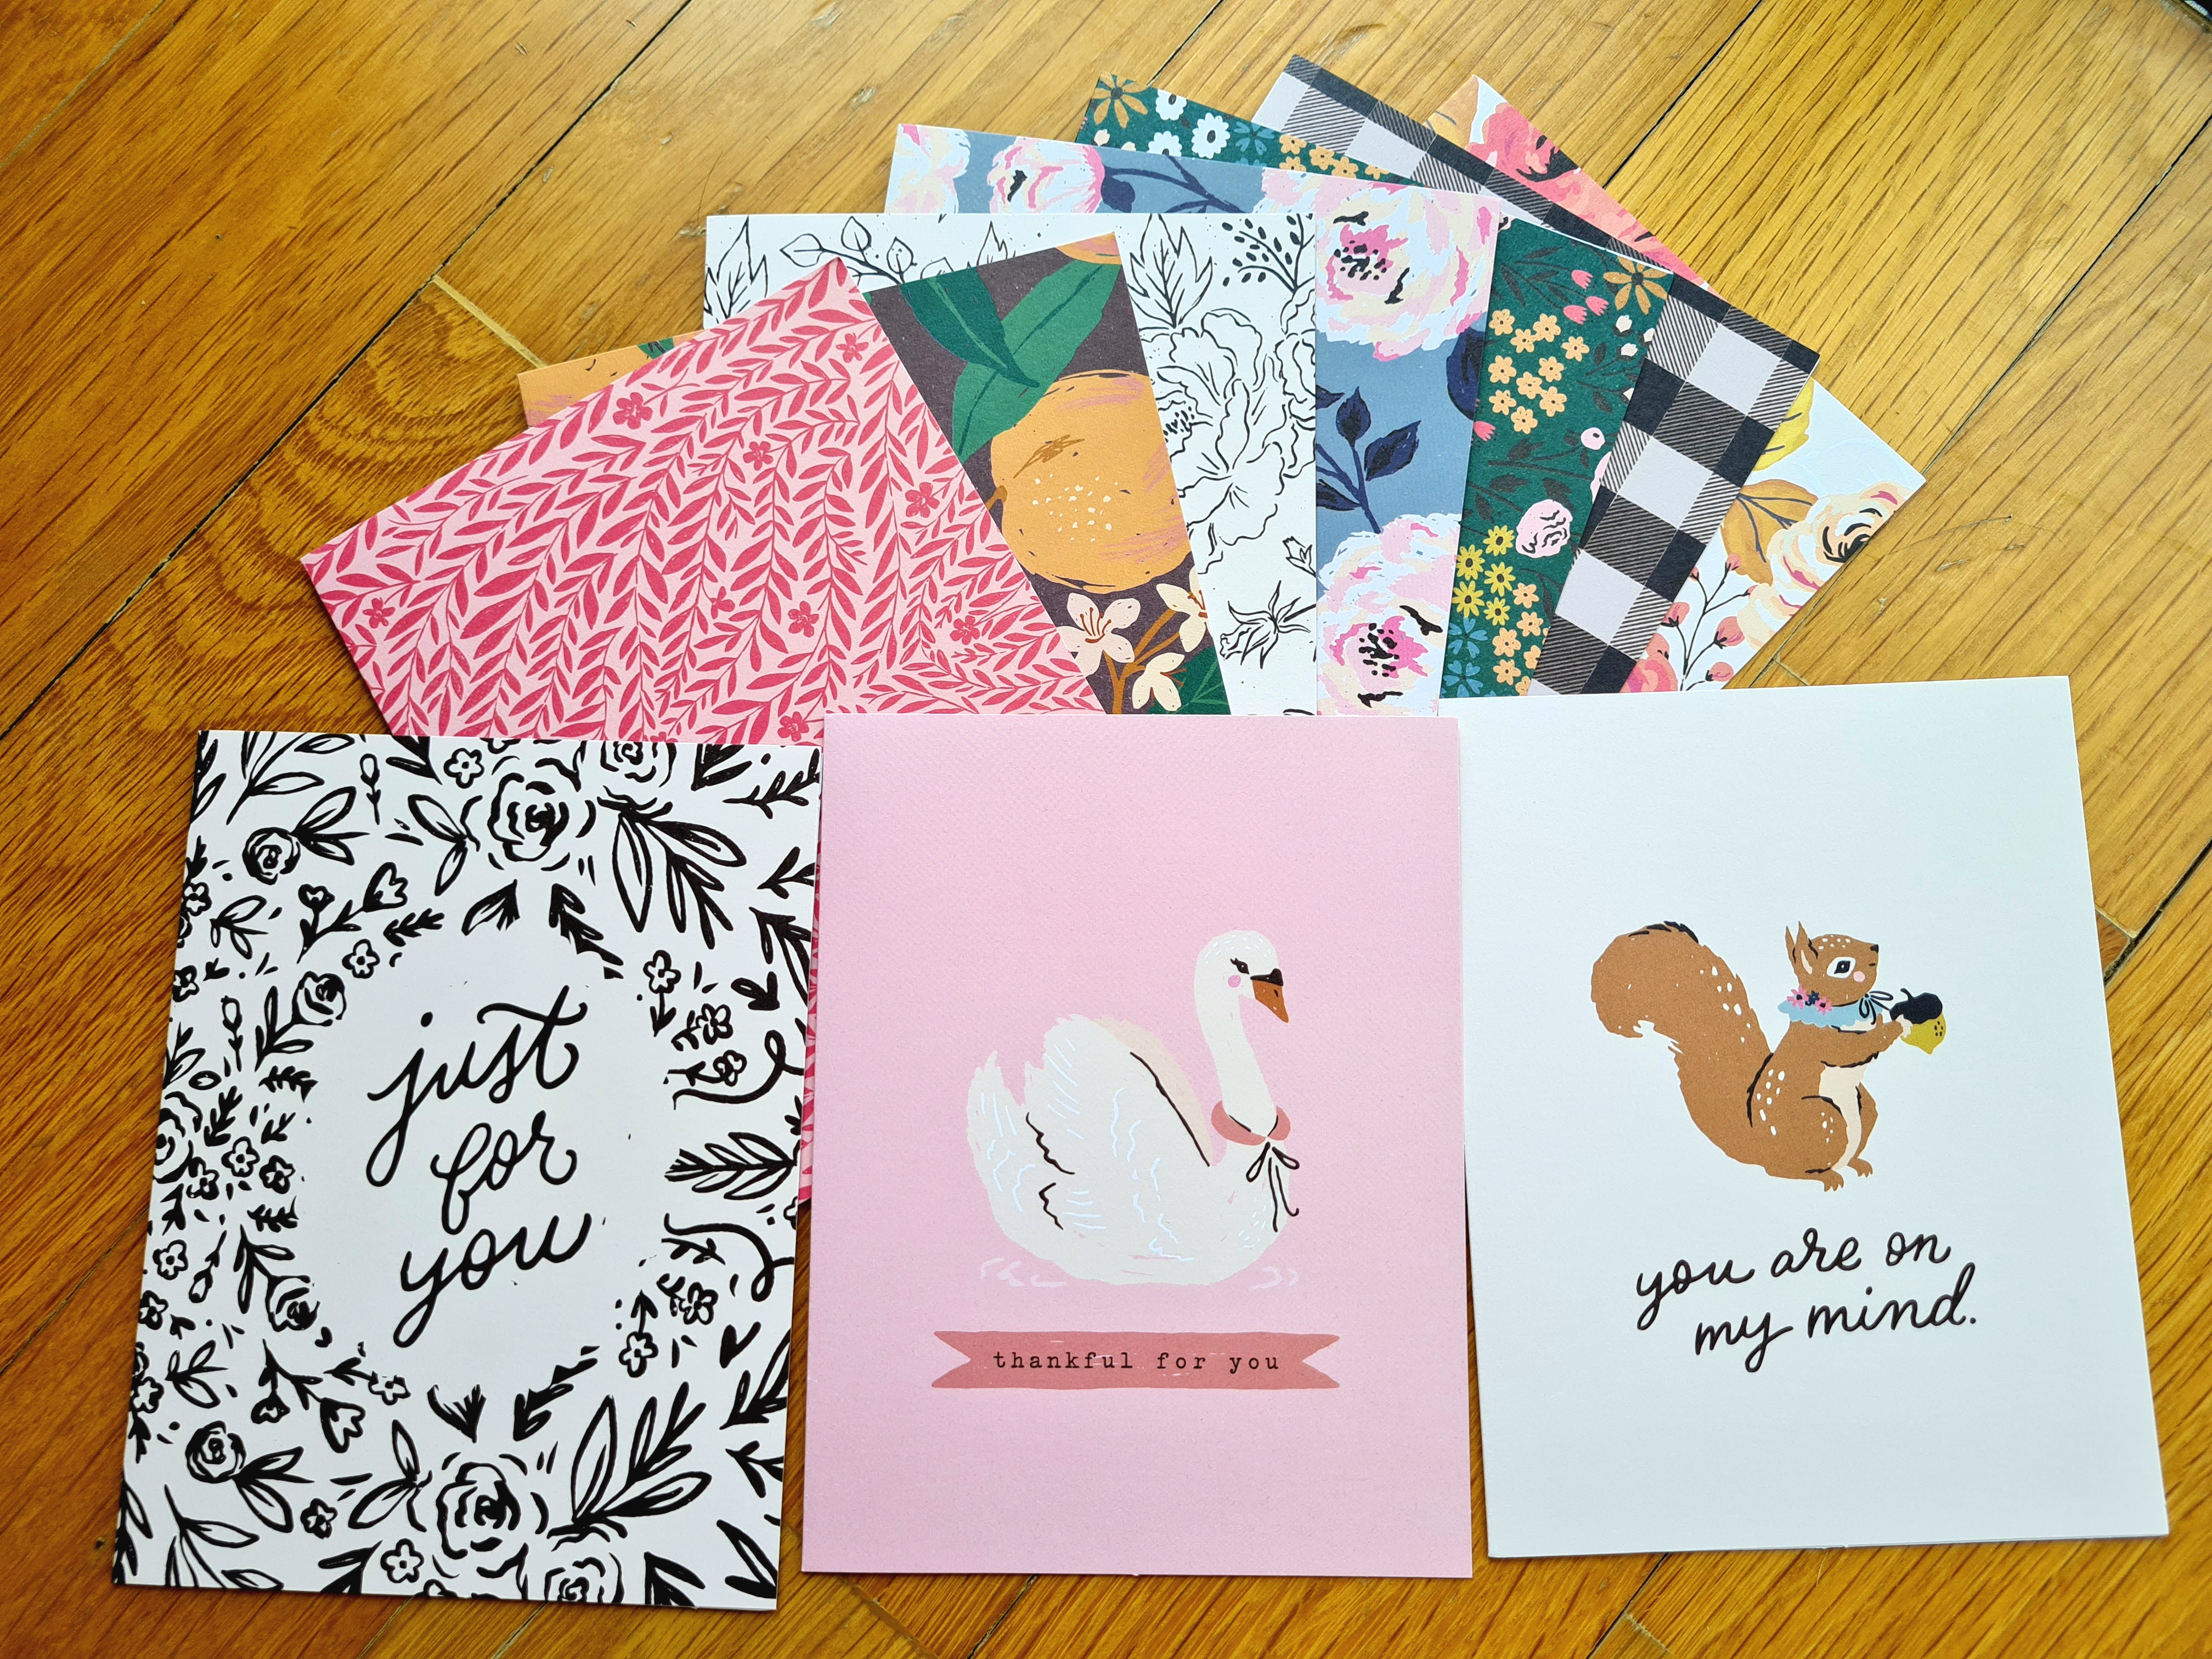
However, inspiration hit when I saw the Maggie Holmes Marigold boxed cards on sale last month, and although I don’t like the sentiments on these 3 cards, the focal designs are beautiful and I bought the set without further hesitation.

My idea is to make use of the central focal pictures in window cards and remove/hide the unwanted sentiments. The black & white “Just for You” card is perfect for this – all I have to is to carefully tear away the sentiment in the centre for a hole that’s large enough for the swan/squirrel to peek through. This has to be done slowly in small steps though, as I did not want the words below the animal images to show through.

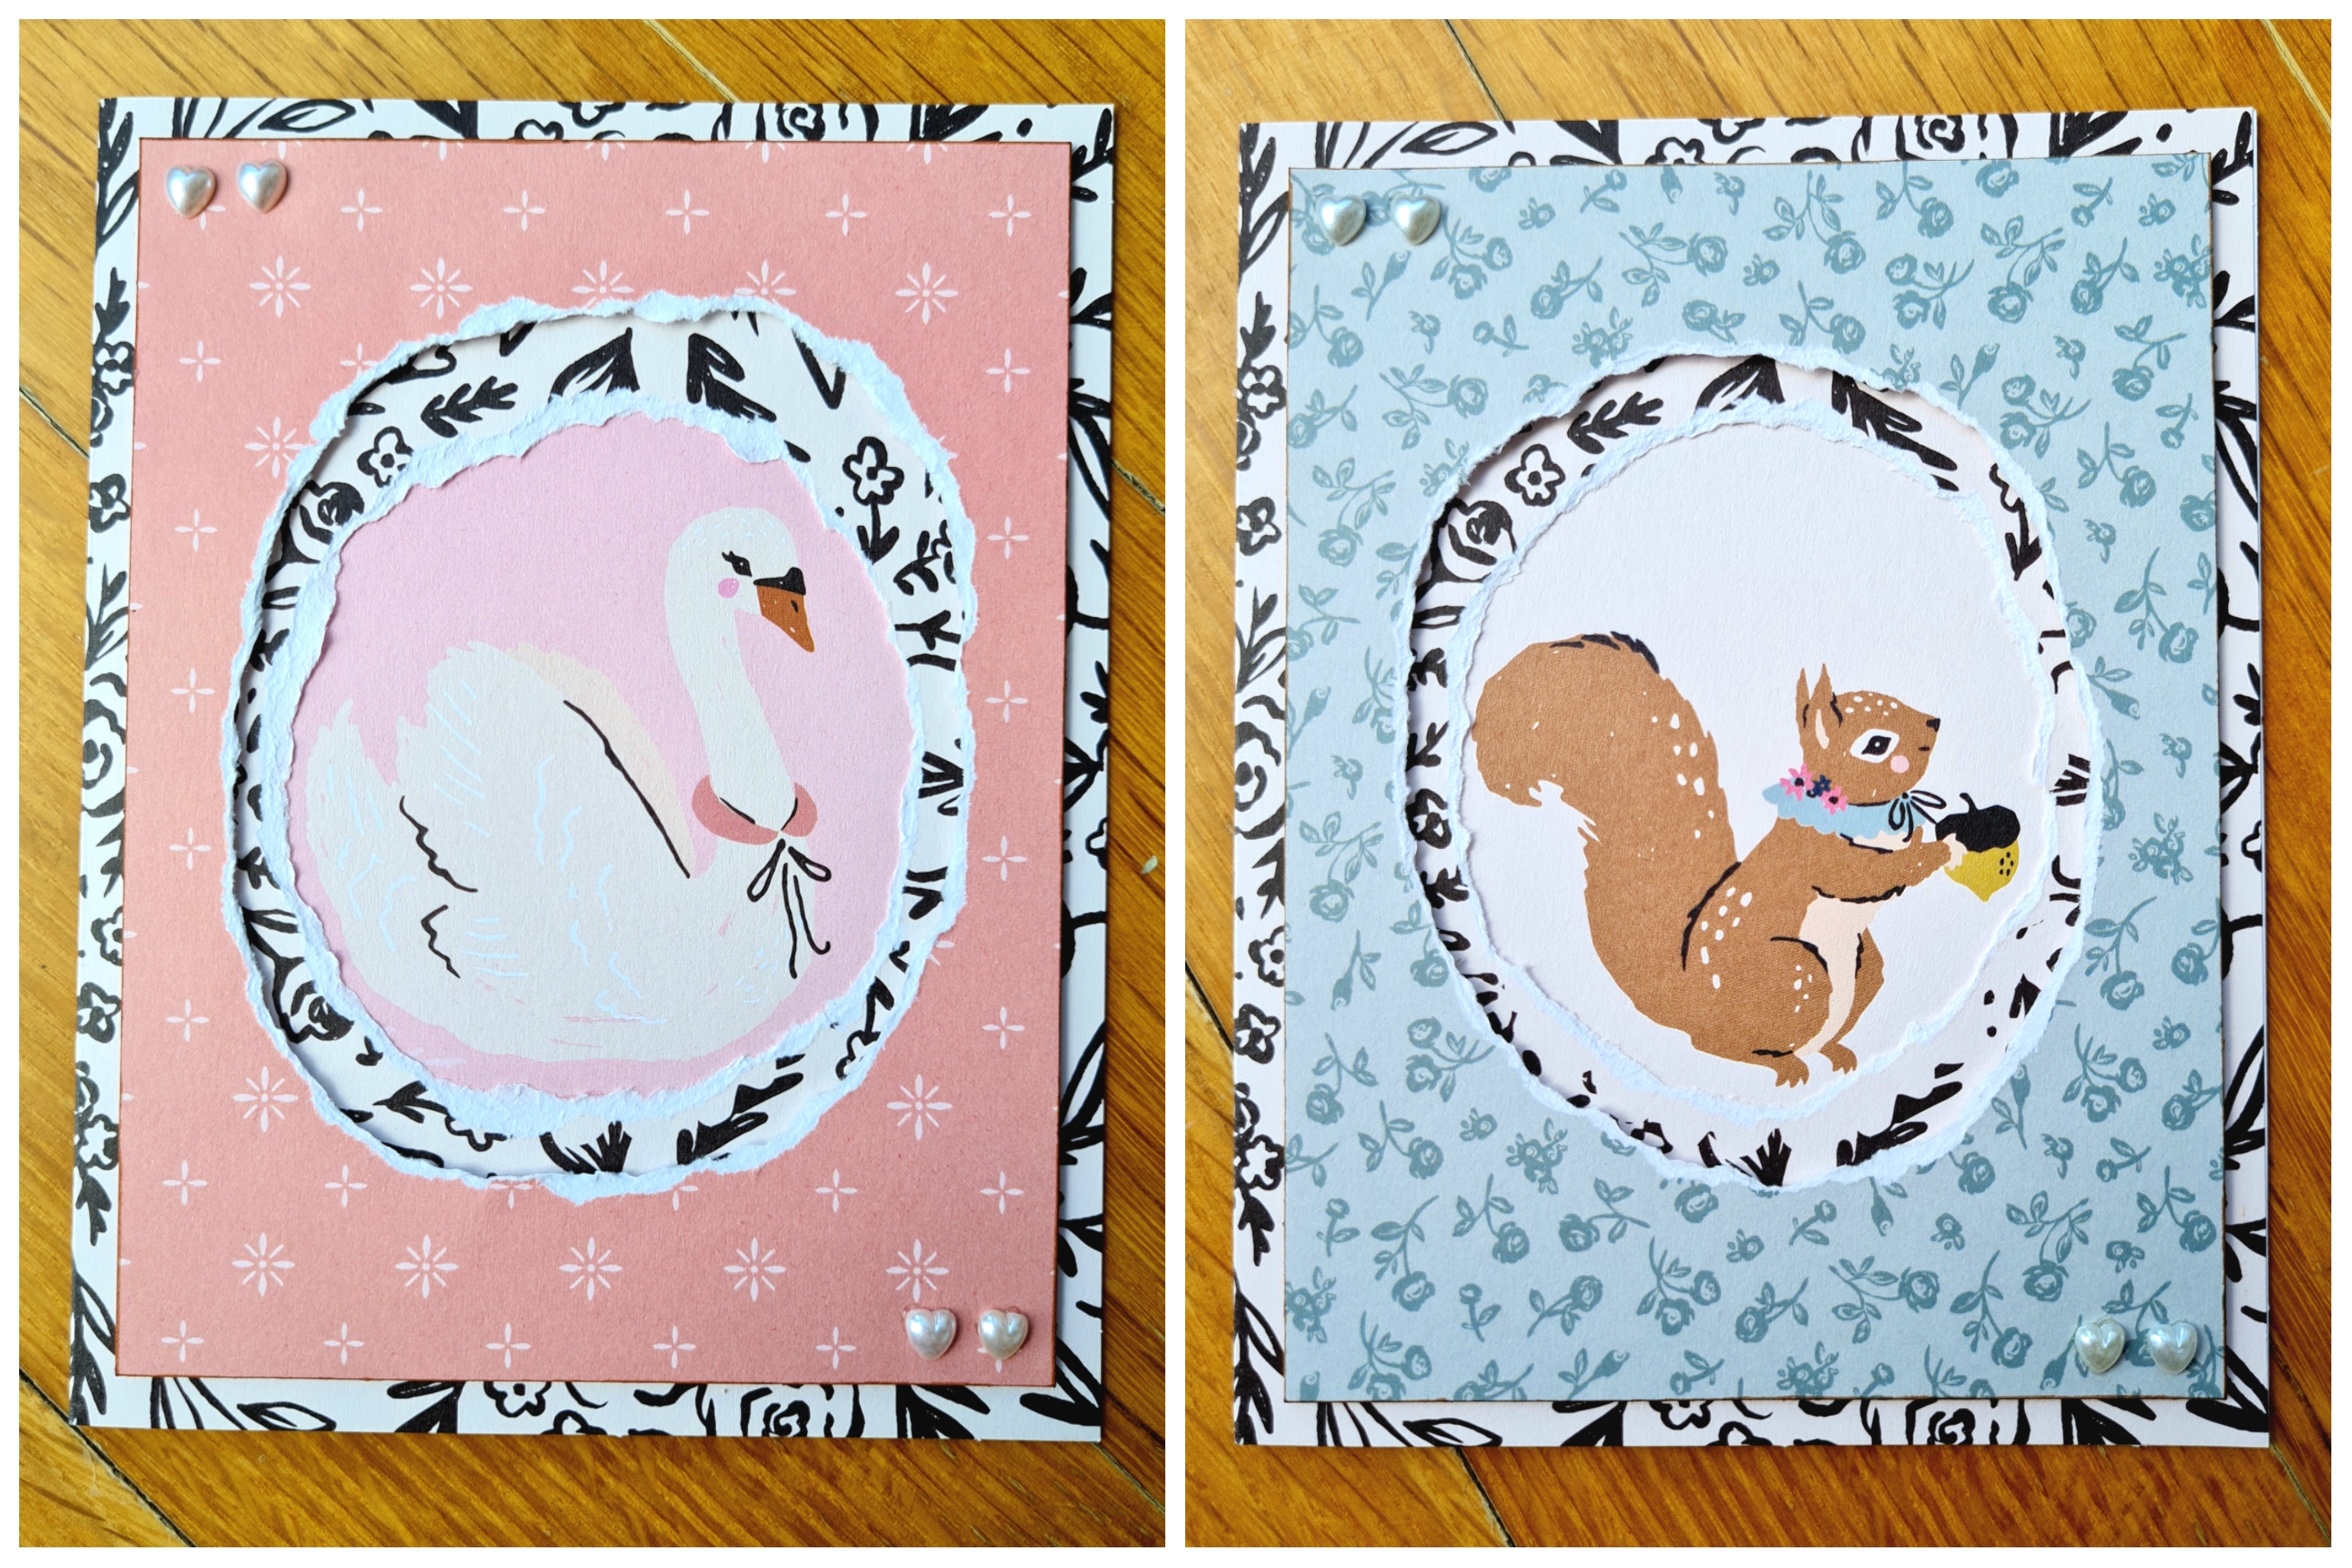
The back of the swan and squirrel cards have different patterned designs from the front, and so made beautiful contrasting secondary windows. I raised these 2nd tier windows on used packaging foam for a tad of dimension. Some adhesive pearly hearts complete the design.

I had trimmed the swan and squirrel papers to fit the position of the sentiment window. As a result, the inside of these cards are uneven. Initially I did not know what to do, but after completing the next set of cards, I had leftover black & white patterned paper. These are just right for covering up the mess and showing off a pretty patterned internal card base!

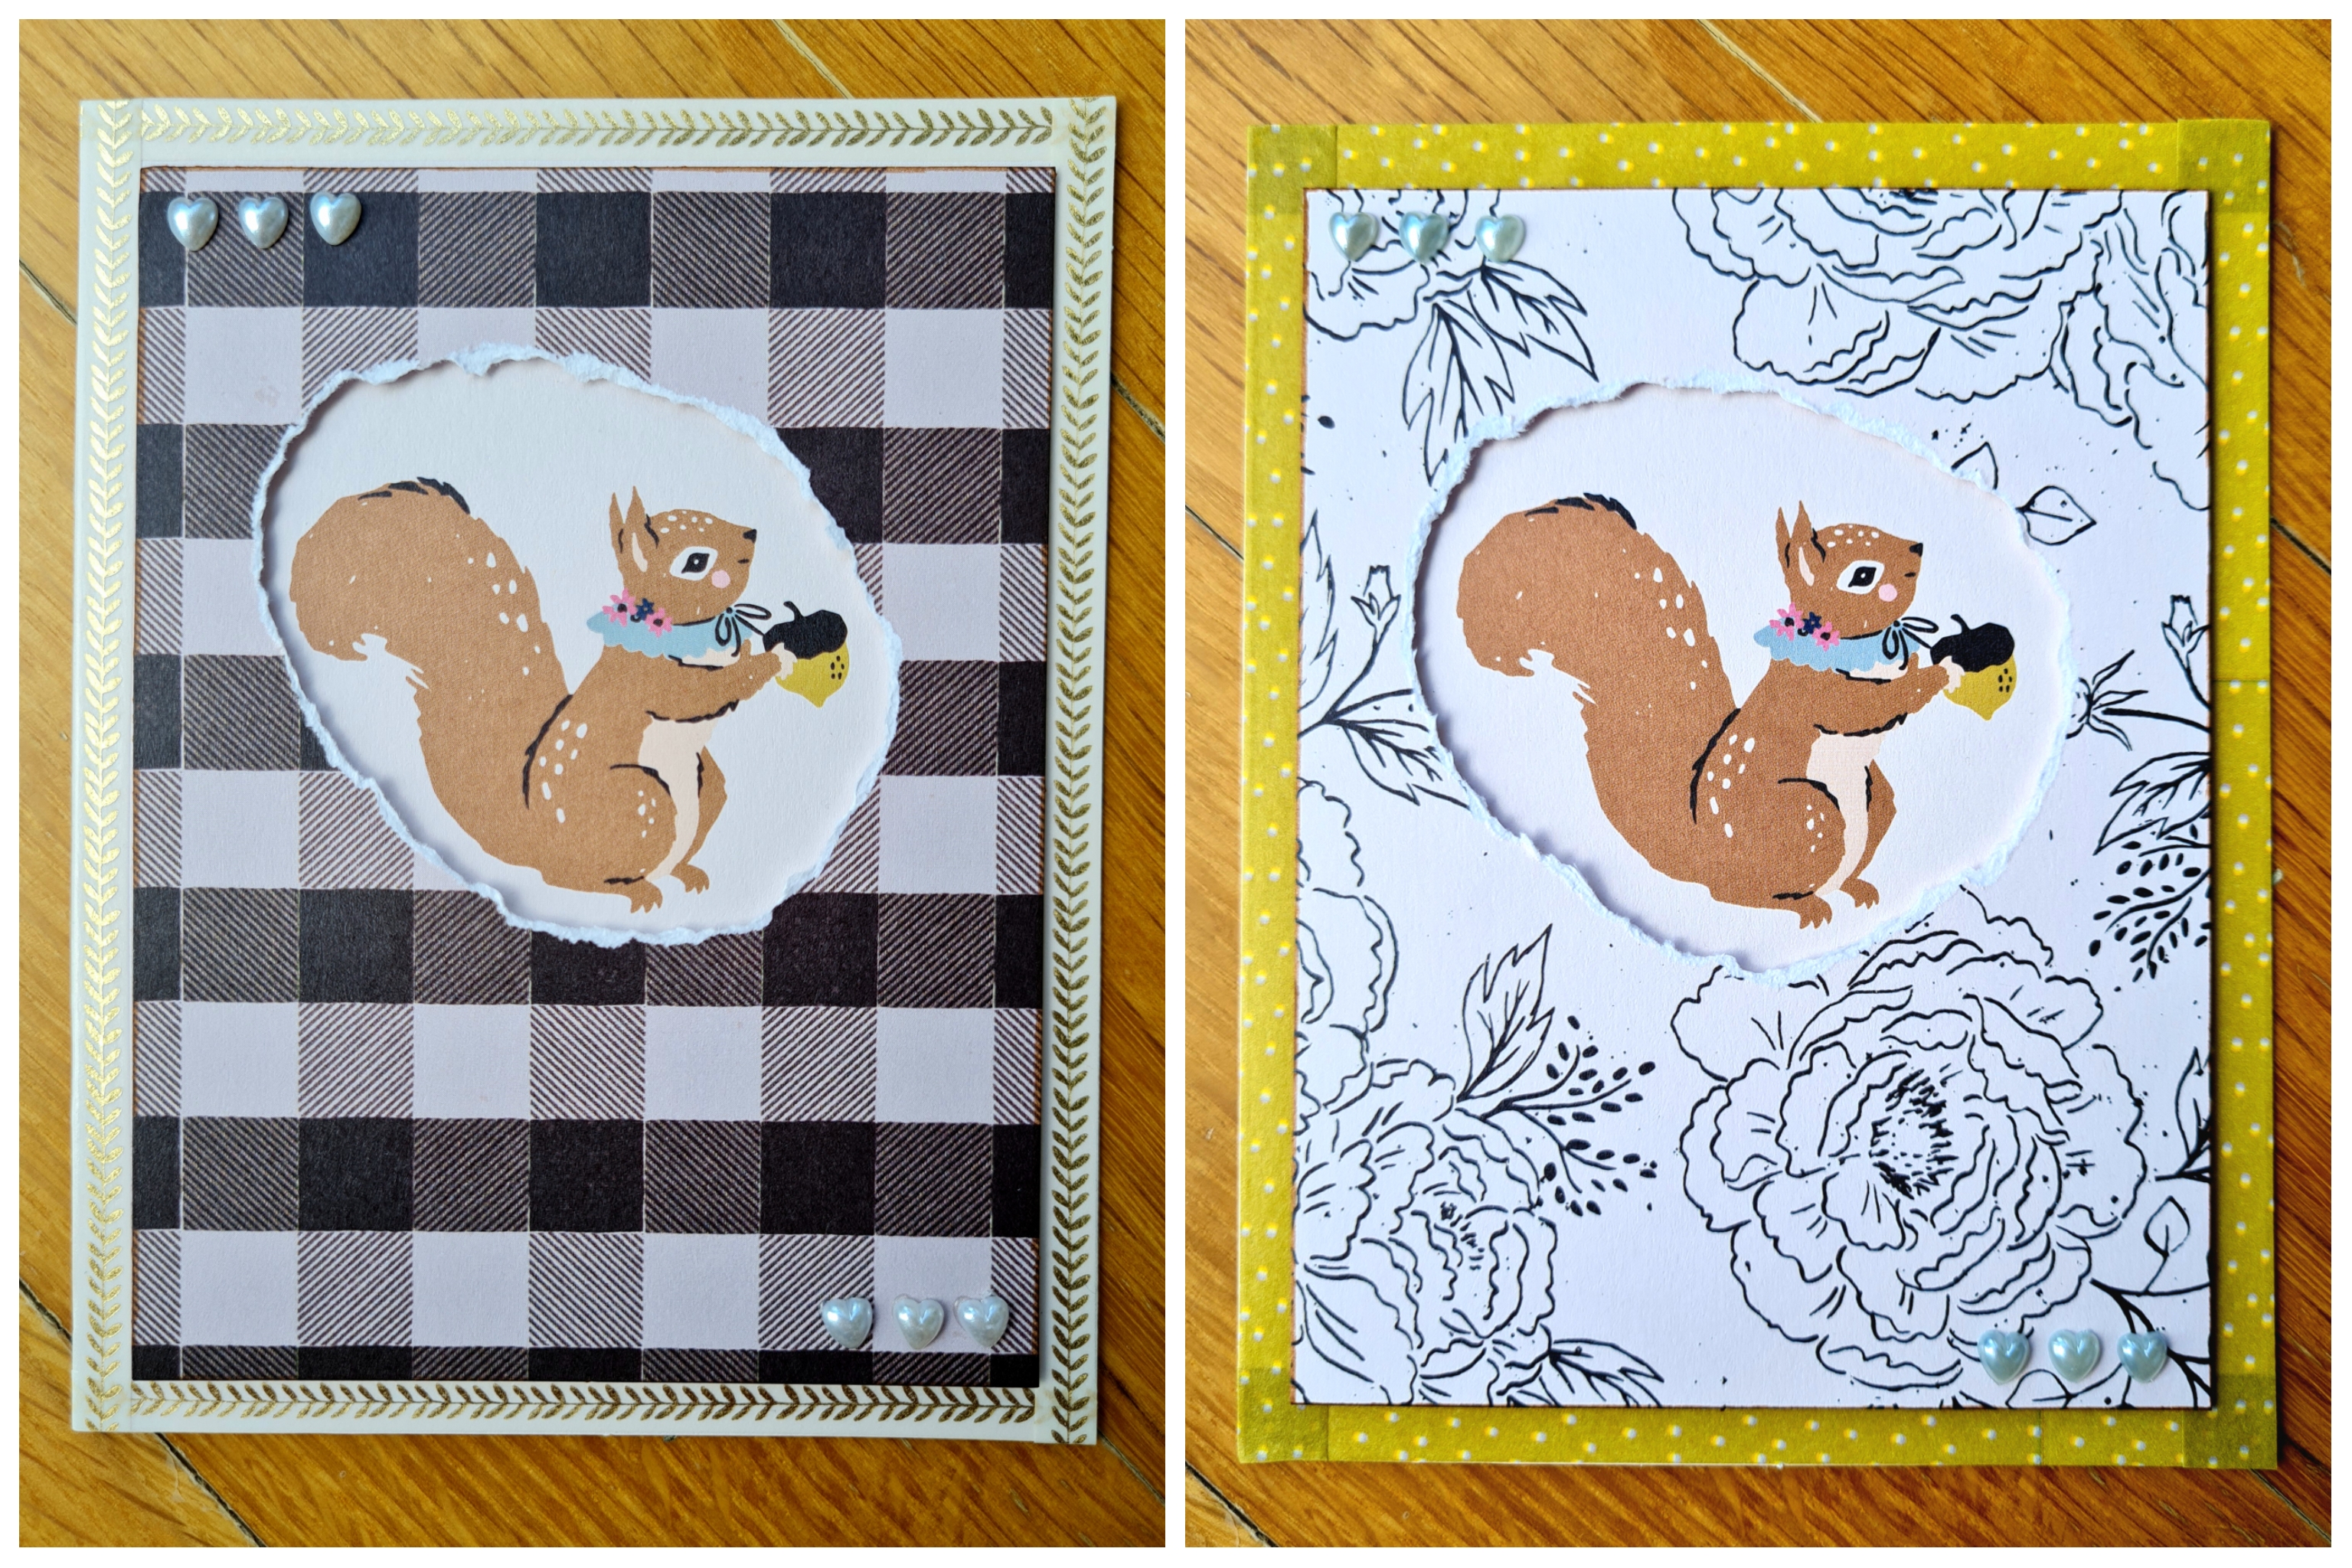
The next 2 cards are created using the squirrel card base – I selected 2 other black & white patterned card bases from the set and trimmed off 1/2″ from the length & breath of the rectangle. I made sure the windows are big enough to show the squirrel but small enough not to reveal the sentiment below it. The resulting window panels are again raised on used packaging foam for more dimension.

As the squirrel card base is white, there wasn’t much contrast between the 2 layers. So I used the Willow Lane washi tape set in my stash to line the white borders.

The washi tapes are also used to decorate the envelopes simply.

I had considered adding ribbon bows or paper flowers to the bottom of the windows as I felt there was too much plain empty space, but in the end decided to just let it be.

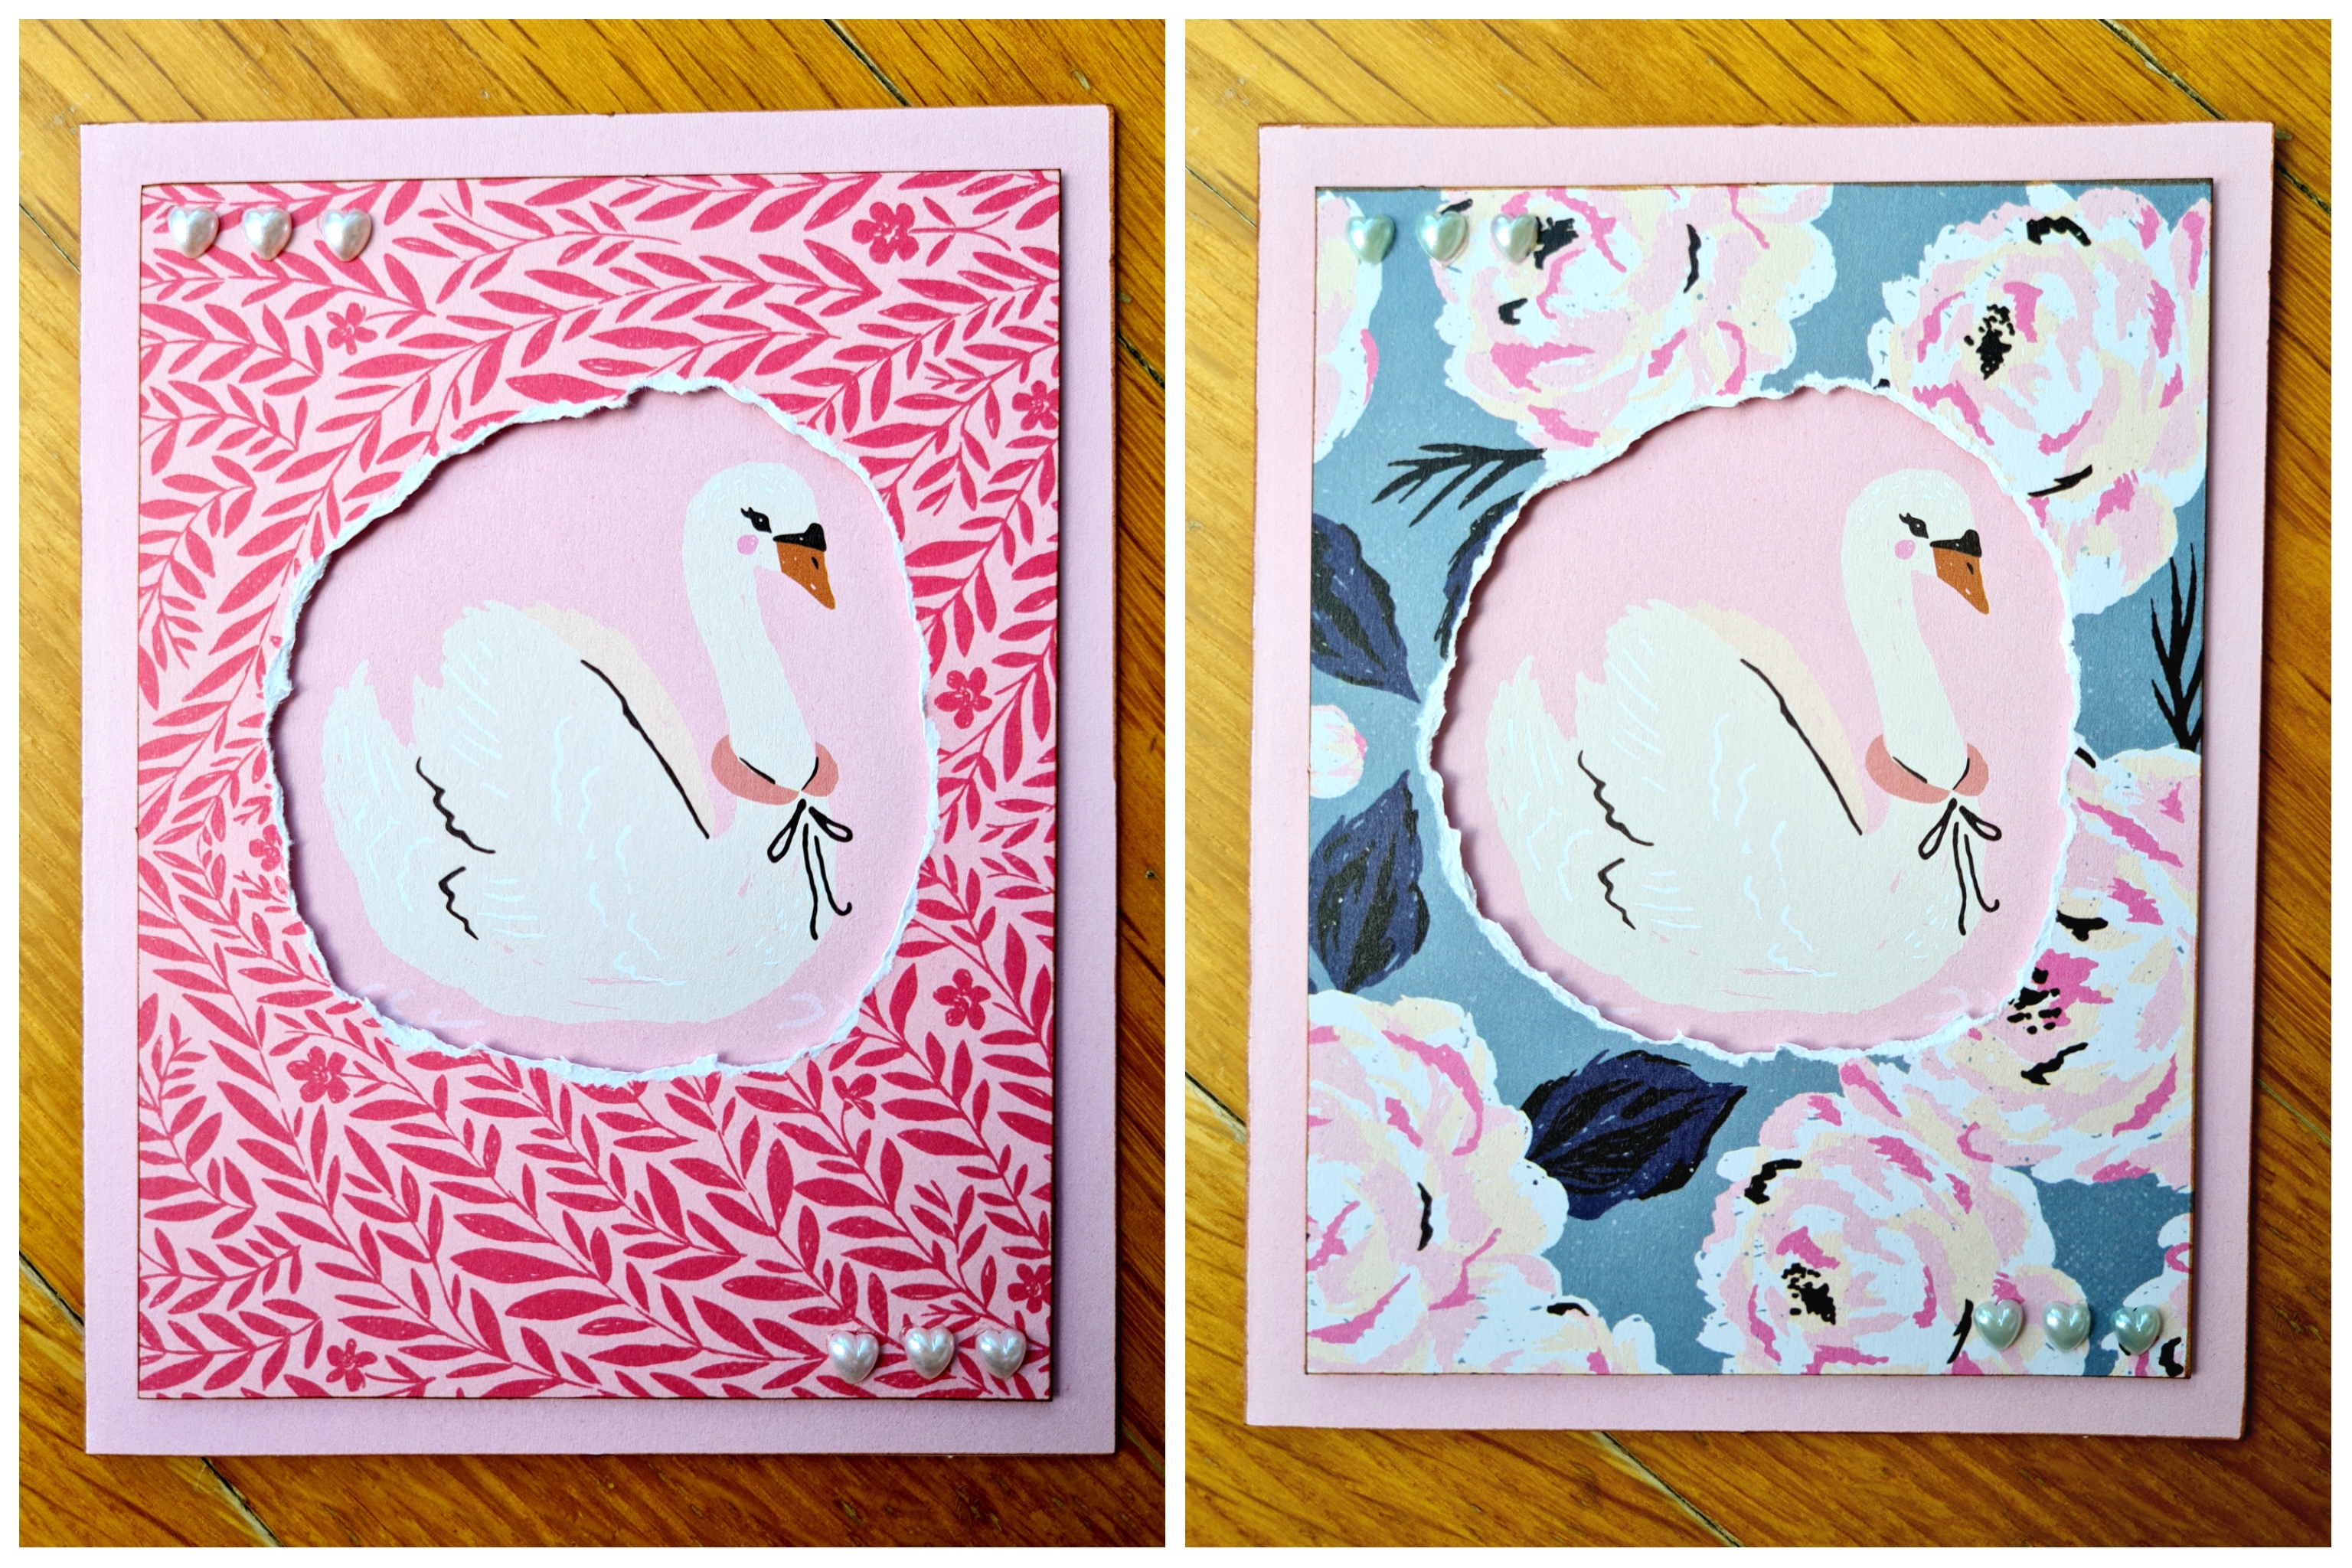
Next I did similarly with the swan card bases, this time selecting 2 other pinkish patterned card bases as the raised window panels. The resulting cards are a tad too pink for my taste – I must try to avoid this combination in future!

When I bought this boxed cards set, I had given myself a little challenge: to use up all the 40 cards – and 40 envelopes – in the set!! I wanted to use the cards as crafting materials, such as for fussy cutting. So far, this set of 6 window cards use up only 12 card bases and 6 envelopes. I have plans to use the remaining cards in the set for accordian albums and coptic bound booklets. Hopefully I can persevere and not let this become another unfinished Work-In-Progress!

Prima Marketing Watercolour Florals Mini 3-ring Art Journal Pages

I have finally gotten to work on my blue mini 3-ring art journal with pages made using Prima Marketing Watercolour Florals pages. Usually I like to have several pages created with the same set of art supplies so that there is some form of unity and it reads like a book. For a start, I wanted to use the cut-aparts of the Dreamy Florals paper to serve as the main focus, supported by other paper scraps from the collection.

Sometimes simple is enough, especially when the papers used are pretty enough on their own! I found a pack of half used adhesive pearl hearts in my stash and decided to try to use it up in this journal.

It is of course impossible for me not to include other ‘neutral’ craft supplies in such art journaling. Paper dollies and tulle fabric are useful for various different colour schemes. The dense pattern of the square dolly turns out perfect in covering the colourful paper that I didn’t really like.

Of course not every page turned out satisfactory. For several pages I created using washi stickers bought online; the colours matched well but somehow the final result just didn’t blend as well as I envisioned.

Probably my mood just wasn’t right for those days?? When inspiration hits, all it takes was just 5 fussy cut pictures to enhance the paper pattern.

Tried to incorporate the use of coloured paper clips but did not want it to show on the reverse side, so I had it clipped to another piece of paper instead.

The layout that inspired my journal book cover. I fussy cut multiple Watercolour Drops and have the laser cut dolly in the centre, so it looks like a flower. I wanted to add lace along the edge of the page, but I trimmed off too much paper and the page became smaller than the others. The back of the lace doesn’t look very good on the reverse page, so I transferred the page to the front and used it to write a few short notes. Selected another paper where the pattern would complement this design and placed it behind as background.

In the end, simple layouts are still the best! Some days I find putting effort in finding matching paper patterns more rewarding than trying out new fancy tricks. At least that’s the case till I learn more……

A complete video flip-through is on my Instagram.

Decorated Cover for Mini Blue 3-ring Art Journal

I have recently finally started working on my little 3-ring art journal book – the blue one, with pages made using Prima Marketing Watercolour Florals papers. All along I have been using the aquamarine side of the Dreamy Florals paper as the cover page, but last week inspiration hit while I was working on one of the art journal pages, and it was a quick job to replicate the idea (I’ll share the art journal pages in a separate post) to create the front & back covers for the binder book.

The Dreamy Florals paper consists of beautiful cut-aparts but in this case I needed to conceal the 4 different designs on that one piece of 3″ x 4″ paper. This can be achieved simply by using a 4″ paper dolly. The centre is covered by another smaller laser cut paper dolly, topped by a 1.5″ circle punched from one of the Watercolour Florals paper scraps. A fussy cut Watercolour Drop completes the design.

The whole design is actually a tad too white for my taste, but I didn’t have any other suitable coloured dollies to work with. Perhaps I should have tried staining the small laser cut dolly but that would be too much work for me! ;P

Anyway, turns out that the shiny effect of this plastic cover of the binder book provides that touch of sparkle and takes away the blandness of the white dollies. I’m pleased enough with the overall effect to make another cover page.

This other cover was created similarly, but using a square paper dolly and a different patterned paper scrap. In the end I decided to use this as the front cover, as the blue centre matches the blue binder better.

Since the binder book came with a hole at the top of the spine for dangling embellishments, I decided not to waste it, and added some metallic charms & a matching coloured tassel from my stash. Have to remember not to add too many charms though, otherwise the dangle gets too heavy and drags down the plastic cover.

June Planner Pages

Started a tad late on my June planner pages due to family commitments. The Yanji Sweetness material papers I ordered online had arrived in the meantime, so I decided to use them instead of combining the Dried Flowers stickers from Daiso with washi tape as I originally intended.

Totally love these little 83 mm x 56 mm papers from China: 5 pieces each of 10 different designs for each set, all colour coordinated for easy crafting. In fact, I specially kept 1 sheet of each design aside to croon over, so that I can cut into the rest of the pack without feeling guilty! Although this time round, I was too lazy to break out my scissors, so I hand-tore every piece instead.

I had bought from Daiso the entire series of the Dried Flowers stickers in all the 6 different colours available, with the intention of pairing up the green/blue, pink/purple and yellow/beige stickers in my crafting. But turns out that the beige set alone was more than enough when combined with the “Caramel Puff” Yanji Sweetness papers to create calming little scenes in my schedule book. As usual, it’s faster to buy craft supplies than to use them up!!

It’s real hard for me to art journal without sentiment phrases, somehow it just doesn’t look right! So in the end I gave in and added a pack of hashtag words I had on hand – cut previously from a Pebbles Inc paper for quick crafting moments like this!

A Couple of Little Projects with Scraps

After completing 2 tag flips (2″x2″ and 3″x4″) with the two sheets of papers from the Pebbles Inc Kid at Heart collection, I had a handful of cut-aparts left. The pretty hedgehog Celebrate 3″x4″ cut-apart was not really suitable for my tag flip and I decided to use it separately.

Combining it with a suitable 2″x2″ sentiment cut-apart, I added a stripped plastic origami sheet, trimmed to a size that falls between the 2 cut-aparts, thus creating a layered look. Some stickers and the orange character trimmed from another 3″x4″ cut-apart complete the triple-layer tag.

As usual, I wanted to create an Artist Trading Card to record and remember the 2 projects made with this particular paper collection, but having fussy cut into many of the cut-aparts for suitable sentiments and pictures, I did not have any scraps as large as 2.5″ x 3.5″ left. So I had to piece 3 small paper scraps together to meet the required ATC card size, hiding the joints as far as possible by gluing other paper scraps on top. In fact, I had to glue a piece of writing paper to the reverse side so as to have a clean, flat surface to write on.

To remind myself of the 2 tag flip projects, I used the same stickers as embellishments, and also rounded 2 corners with the R10mm punch. The remaining scraps from the paper collection go into the recycling bin as they don’t fit in any of my current stash and I did not want to grow my stash further in this particular style.